If you’ve ever watched professional golfers in action, you’ve probably marveled at their ability to shape the ball’s flight path with precision. The draw and fade shots can add a whole new dimension to your game, allowing you to navigate tricky fairways or attack tough pin positions. In this article, we’ll explore some essential tips and techniques that can help you master these shots and take your golfing skills to the next level. Whether you’re a seasoned player or just getting started, get ready to unleash your inner shot-shaper and leave your opponents in awe.
Understanding the Basics
Understanding Draw and Fade Shots
When it comes to golf, being able to shape your shots can be a game-changer. Two popular shot shapes that every golfer should be familiar with are the draw and the fade. A draw shot is one that curves gently from right to left (for right-handed golfers), while a fade shot curves from left to right. Understanding how to hit these shots can give you more control over the ball, allowing you to navigate around obstacles and even add distance to your shots.
Difference between Draw and Fade
The key difference between a draw and a fade lies in the direction that the ball curves. A draw shot curves from right to left (for right-handed golfers), while a fade curves from left to right. To achieve a draw, the clubface is closed at impact, generating sidespin that causes the ball to move from right to left. In contrast, a fade is achieved by an open clubface, resulting in sidespin that causes the ball to move from left to right. Understanding this distinction is crucial for choosing the right shot shape for the situation.
Importance of Shot Shaping
Shot shaping is a skill that separates average golfers from exceptional ones. The ability to shape shots enables golfers to adapt to different course conditions, wind directions, and to strategically navigate around hazards. By mastering the draw and fade shots, you can add more versatility to your game and ultimately lower your scores. Being able to intentionally shape your shots also boosts your confidence on the golf course, knowing that you have the skills to tackle any situation that comes your way.
Grip and Setup
Achieving a Neutral Grip
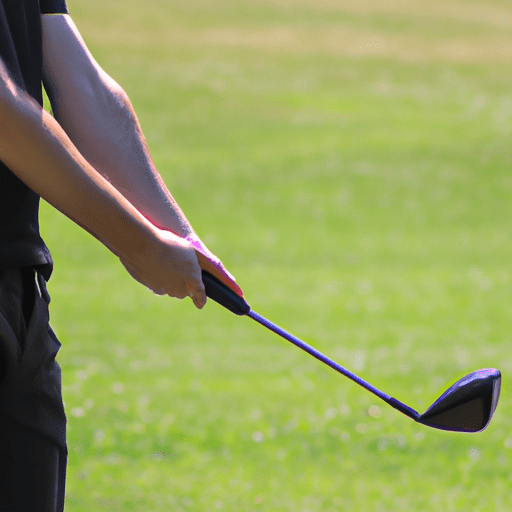
Before attempting to hit a draw or fade, it’s important to have a solid grip that allows for flexibility in your shots. A neutral grip is essential for effectively shaping the ball. To achieve a neutral grip, start by holding the club with your left hand (for right-handed golfers) so that it rests diagonally across your fingers. Then, place your right hand on the club, making sure that the Vs formed by your thumbs and index fingers point towards your right shoulder. This grip promotes a square clubface position at impact, setting the foundation for consistent and accurate shots.
Setup Position for a Draw Shot
To set up for a draw shot, start by aligning your feet, hips, and shoulders to the right of your target (for right-handed golfers). This closed stance helps encourage an inside-out swing path, which is essential for generating the right-to-left shot shape. Position the ball slightly forward in your stance, towards your front foot. This promotes an upward strike on the ball and encourages a more in-to-out swing path. By setting up correctly, you’re giving yourself the best chance to execute a well-shaped draw shot.
Setup Position for a Fade Shot
For a fade shot, you’ll want to take the opposite approach in your setup position. Align your feet, hips, and shoulders slightly to the left of your target (for right-handed golfers). This open stance will help promote an outside-in swing path, which is key for producing a left-to-right shot shape. Move the ball slightly back in your stance, towards your back foot. This encourages a slightly downward strike on the ball and aids in promoting an out-to-in swing path. By correctly positioning yourself before the swing, you can increase your chances of hitting a controlled and intentional fade.
Body Alignment
Aligning for a Draw Shot
In addition to the setup position, proper body alignment is crucial for hitting a draw shot. When aligning your body for a draw, aim your clubface slightly to the right of your target (for right-handed golfers). This closed clubface position complements the closed stance and encourages the right-to-left ball flight. Align your feet, hips, and shoulders parallel to the target line, ensuring that your body is positioned to the right of the intended target. This alignment helps promote an inside-out swing path, allowing you to hit the draw with accuracy and confidence.
Aligning for a Fade Shot
To achieve a fade shot, adjust your body alignment accordingly. Aim the clubface slightly to the left of your target (for right-handed golfers). This open clubface position supports the open stance and encourages the left-to-right ball flight. Align your feet, hips, and shoulders parallel to the target line, with your body positioned slightly to the left of the intended target. This alignment facilitates an outside-in swing path, enabling you to hit the fade effectively. By aligning your body correctly, you’ll have a solid foundation for executing precise fade shots.
Common Alignment Mistakes and Fixes
Even with a good understanding of body alignment, it’s easy to make common alignment mistakes. One of the most common errors is aligning the body along the target line instead of parallel to it. This mistake often leads to inconsistent shot shapes and makes it difficult to control the ball’s trajectory. To fix this, always double-check your alignment before each shot. Use intermediate targets or alignment aids such as alignment sticks or the seams on the golf ball to ensure that you’re properly aligned. Taking the time to align yourself correctly will greatly improve your shot-making abilities.
Swing Path and Clubface Control
Swing Path for a Draw Shot
To consistently hit a draw shot, you need to focus on your swing path. A draw is created by an inside-out swing path, meaning that the clubhead travels from inside the target line during the downswing. This swing path allows the clubface to square up at impact while the clubhead is moving from right to left (for right-handed golfers), resulting in the desired draw shot shape. To achieve this swing path, focus on initiating your downswing by turning your hips towards the target while maintaining a controlled arm swing. This promotes an inside-out swing path and sets the stage for a beautiful draw.
Clubface Control for a Draw Shot
In addition to the swing path, clubface control plays a vital role in hitting a draw. To create a draw shot, you want the clubface to be slightly closed at impact. Aim to have the clubface pointing slightly right of the target (for right-handed golfers) at impact. This closed clubface position ensures that the ball starts to the right and then curves back towards the left. To improve clubface control, focus on maintaining a firm wrist and forearm position throughout your swing, avoiding any excessive flipping or rolling of the wrists. By mastering these elements, you’ll be well on your way to consistently hitting accurate draw shots.
Swing Path for a Fade Shot
For a fade shot, the swing path needs to be adjusted to promote the desired left-to-right ball flight. An outside-in swing path is crucial for hitting a fade. During the downswing, focus on bringing the clubhead across the target line from the outside. This swing path, combined with an open clubface at impact, produces the desired fade shot shape. To achieve the correct swing path, visualize swinging the club along an imaginary path that starts slightly to the right of the target (for right-handed golfers) and then moves across it. This visualization can help you execute a consistent and controlled fade shot.
Clubface Control for a Fade Shot
Just like with a draw shot, clubface control is essential when aiming to hit a fade. To achieve a fade shot, you’ll want to have the clubface slightly open at impact. Aim to have the clubface pointing slightly left of the target (for right-handed golfers) at impact. This open clubface position ensures that the ball starts to the left and then curves back towards the right. As with the draw shot, maintaining a firm wrist and forearm position throughout the swing will help you control the clubface and achieve a consistent fade. By practicing and refining these techniques, you’ll be able to confidently shape your shots and take advantage of various course conditions.
Drills to Improve Swing Path and Clubface Control
To refine your swing path and clubface control for both draw and fade shots, there are several drills you can practice. One helpful drill for improving swing path is the “inside-out” drill. To perform this drill, place an alignment rod or club on the ground along the target line, positioning it so that it is angled from inside the target line towards the ball. During your swing, focus on swinging the clubhead along the line of the rod, ensuring that you’re swinging from inside out. This drill encourages the correct swing path for a draw shot. For clubface control, an effective drill is the “stick drill.” Simply place a tee or golf alignment stick through the grip end of your club so that it extends out towards the clubhead. Practice your swing while keeping the stick parallel to your target line. This drill helps promote a square clubface at impact, leading to more consistent and controlled shots.

Weight Distribution and Ball Position
Weight Distribution for a Draw Shot
Proper weight distribution is integral to executing a draw shot successfully. To achieve a draw, focus on shifting your weight slightly towards your front foot during the downswing. This weight transfer promotes an inside-out swing path and encourages a right-to-left ball flight. Start your swing with a balanced weight distribution, then gradually feel the weight shift towards your front foot as you transition into the downswing. By maintaining good balance and weight transfer, you’ll be able to generate the necessary body movements to hit accurate draw shots.
Ball Position for a Draw Shot
Ball position also plays a role in shaping a draw shot. To set up for a draw, place the ball slightly forward in your stance, towards your front foot. This positioning allows for a more in-to-out swing path and encourages the desired right-to-left ball flight. As you set up, ensure that the ball is aligned with the inside of your front heel. This ball position helps promote a higher launch angle and adds more backspin to the ball, resulting in a longer and more controlled draw shot. Experiment with different ball positions during your practice sessions to find the most comfortable and effective placement for your draw shots.
Weight Distribution for a Fade Shot
For a fade shot, the weight distribution needs to be adjusted to create the desired left-to-right ball flight. During the downswing, focus on keeping your weight slightly more centered or even favoring your back foot. This weight distribution promotes an outside-in swing path and encourages a fade shot shape. By maintaining a slight backward weight shift, you’ll be able to swing along the desired path and hit controlled fade shots.
Ball Position for a Fade Shot
Just as with a draw shot, ball position is essential for executing a fade shot effectively. When setting up for a fade, position the ball slightly back in your stance, towards your back foot. This placement encourages an out-to-in swing path and promotes the desired left-to-right ball flight. Align the ball with the inside of your back heel, ensuring that it is positioned correctly for the fade shot. A well-placed ball position for a fade shot helps to achieve a lower launch angle and imparts less backspin on the ball, resulting in a controlled and intentional fade. Experiment with different ball positions to find the most comfortable and effective placement for your fade shots.
Importance of Body Rotation
Body Rotation for a Draw Shot
To maximize the effectiveness and consistency of your draw shots, it’s crucial to emphasize proper body rotation throughout the swing. Generating power and controlling the clubface ultimately come from the rotation of your hips, torso, and shoulders. During the backswing, focus on turning your shoulders away from your target while allowing your hips to rotate in the same direction. This full rotation creates torque and potential energy that can be released during the downswing. As you transition into the downswing, initiate the rotation of your hips towards the target, followed by the rotation of your torso and shoulders. This sequential rotation helps generate clubhead speed and promotes an inside-out swing path, resulting in a well-shaped draw shot.
Body Rotation for a Fade Shot
Similar to the draw shot, proper body rotation is essential when hitting a fade. However, the rotation sequence differs slightly to produce the desired left-to-right ball flight. During the backswing, focus on turning your shoulders slightly less and your hips slightly more compared to a draw shot. This adjustment promotes a more open stance and encourages an outside-in swing path. As you transition into the downswing, begin by initiating the rotation of your hips towards the target, followed by the rotation of your torso and shoulders. This sequential rotation helps generate clubhead speed and promotes the desired fade shot shape. By mastering this body rotation technique, you’ll be able to consistently hit accurate and controlled fade shots.
Exercises to Improve Body Rotation
Improving body rotation is crucial for consistent and accurate shot shaping. To enhance your body rotation, there are several exercises you can incorporate into your practice routine. One effective exercise is the hip rotation drill. Stand in your golf setup position, holding a club across your chest. Initiate the movement by rotating your hips to the right (for right-handed golfers), then to the left, while keeping the club steady against your chest. This drill helps improve hip mobility, allowing for better rotation during your swing. Another beneficial exercise is the torso rotation stretch. Stand with your feet shoulder-width apart and interlace your fingers behind your head. Slowly rotate your upper body to the right, then to the left, feeling the stretch in your torso. This exercise helps increase your range of motion in the upper body, facilitating a more effective and fluid swing. By incorporating these exercises into your routine, you’ll be on your way to improved body rotation and more consistent shot shaping.
Effect of Loft and Club Selection
Understanding Loft and Shot Shape
The loft of the club you choose for a particular shot has a significant impact on the shot shape. Generally, lower lofted clubs, such as drivers or low irons, tend to produce a straighter ball flight. On the other hand, higher lofted clubs, such as wedges, promote more spin and increased shot shaping potential. Understanding the relationship between loft and shot shape is key to selecting the appropriate club for your desired draw or fade shot.
Choosing the Right Club
When deciding on the club for a draw or fade shot, consider the distance, wind conditions, and severity of the shot shape you’re aiming for. As a general rule, for a draw shot, it’s advisable to use a club that has more loft than usual, such as a 7-iron instead of a 6-iron. The extra loft helps produce the desired right-to-left ball flight. Conversely, for a fade shot, consider using a club with less loft than usual. For example, using a 5-iron instead of a 6-iron would promote the desired left-to-right ball flight. By carefully selecting the right club, you’ll be able to enhance the shot shape and achieve your desired results more effectively.
Adjusting Loft to Enhance Draw or Fade
Another way to manipulate shot shape is by adjusting the loft of the club. Generally, decreasing the loft of the clubface can promote a fade, while increasing the loft can encourage a draw. This adjustment alters the club’s dynamic loft at impact, affecting the ball’s launch angle and spin rate. To enhance a fade, consider using a slightly weaker grip, effectively decreasing the loft of the clubface. Conversely, to enhance a draw, a slightly stronger grip can help increase the loft of the clubface, promoting the desired ball flight. These subtle adjustments in loft can make a significant difference in the shot shape, allowing you to fine-tune your performance on the golf course.
Dealing with Wind and Course Conditions
Adapting to Wind Conditions
When playing golf, wind conditions play a significant role in shot shaping. Adjusting your shot shape to compensate for the wind can help you optimize your distance and accuracy. To counteract a crosswind, aim to hit shots that go against the direction of the wind. For example, if the wind is blowing from right to left, aim to hit a draw shot to counteract the wind’s effect. By intentionally shaping your shots to navigate the wind, you can achieve greater accuracy and consistency in challenging conditions.
Course Strategies for Draw and Fade Shots
Each golf course presents its own challenges and demands different shot shapes to navigate around hazards and maximize scoring potential. When planning your strategy for a particular course, consider the layout and positioning of the holes. If there are holes that require you to hit around obstacles or doglegs, shaping your shots accordingly can give you a significant advantage. For example, if a hole features a dogleg to the left, hitting a draw shot can help you position the ball effectively. On the other hand, if a hole requires you to hit a fade over a hazard, shaping your shot in that direction can help you clear the obstacle safely. By strategizing and intentionally shaping your shots, you’ll be able to adapt to the course and make smarter decisions on each hole.
Controlling Shot Trajectory
Controlling shot trajectory is crucial when dealing with different wind and course conditions. To hit shots with a higher trajectory, ensure that you use a club with more loft and position the ball slightly further forward in your stance. This combination promotes a higher launch angle, allowing the ball to stay in the air longer and reducing the effect of crosswinds. To lower the trajectory, consider using a club with less loft and position the ball slightly back in your stance. This setup encourages a lower launch angle, enabling better control and minimizing the impact of headwinds or strong gusts. By adjusting your setup and club selection, you can effectively control the trajectory of your shots and maximize your chances of success in different conditions.
Practice and Visualization Techniques
Practicing Draw and Fade Shots
To develop the ability to consistently hit draw and fade shots, focused practice sessions are essential. Dedicate a portion of your practice time to intentionally shaping your shots. Start by hitting a few warm-up shots to get into a rhythm, then gradually start incorporating draw and fade shots. Experiment with different setups, grips, and swing thoughts to find what works best for you. It’s important to be patient and not get discouraged if your shots don’t shape perfectly right away. Shaping shots takes time and practice, but with dedication and perseverance, you’ll start seeing improvement and gaining more control over your ball flight.
Visualizing the Desired Shot Shape
Visualization is a powerful tool that can greatly enhance your shot shaping abilities. Before each shot, take a moment to visualize the desired shot shape in your mind. Imagine the trajectory of the ball as it curves through the air, landing precisely where you want it to. By creating a clear mental image of your desired shot shape, you’re effectively programming your mind and body to execute that shot. This technique helps improve focus and consistency, allowing you to execute the shot with more confidence and accuracy. Incorporate visualization into your pre-shot routine and notice the positive impact it has on your overall shot shaping skills.
Using Alignment Aids
Alignment aids can be incredibly helpful when working on shot shaping. Simple tools, such as alignment sticks or even the lines on the range mat, can serve as visual guides to ensure proper alignment and swing path. Place an alignment stick or club on the ground along the target line to help you visually confirm that your body and clubface are aligned correctly. Additionally, using alignment sticks as visual references during your practice swings can help you monitor your swing path and ensure you’re hitting the intended shape. By incorporating alignment aids into your practice routine, you’ll develop a more consistent and reliable shot shaping technique.
Troubleshooting and Common Mistakes
Common Mistakes to Avoid
While learning to hit draw and fade shots, it’s important to be aware of common mistakes that can hinder your progress. One common mistake is overexaggerating the draw or fade, which can lead to inconsistent ball flight and missed targets. Avoid trying to hit extreme shots right away and focus instead on gradually shaping your shots. Another mistake is neglecting the fundamentals, such as grip and setup. These factors greatly influence your ability to hit consistent draw and fade shots, so always double-check your fundamentals to ensure they’re in the correct position. Lastly, rushing through your swing and not maintaining a smooth tempo can adversely affect your shot shaping. Take your time, maintain a balanced rhythm throughout your swing, and avoid rushing the process.
Fixing a Hook or Slice
If you find yourself consistently hooking or slicing the ball, there are some adjustments you can make to rectify your shot shape. A hook, which is an exaggerated draw that curves excessively from right to left (for right-handed golfers), is commonly caused by a closed clubface at impact. To fix a hook, focus on rotating your forearms and wrists slightly open through impact, allowing the clubface to be more square at the point of contact. On the other hand, a slice, which is an exaggerated fade shape that curves excessively from left to right, is often caused by an open clubface at impact. To fix a slice, focus on closing the clubface slightly at impact by rotating your forearms and wrists earlier in the downswing. By making these adjustments, you can rectify a hook or slice and start hitting more consistent shots.
When to Use a Draw or Fade
Knowing when to use a draw or fade on the golf course is crucial for scoring well. Draw shots are best suited for situations where you need to navigate around obstacles or position the ball strategically. For example, when confronted with a dogleg to the left, a well-executed draw shot can help you shape your shot around the corner, setting up a shorter approach to the green. Fades, on the other hand, are useful when you need to counteract a prevailing wind or hit a controlled shot into a tight fairway. By intentionally shaping your shots, you’ll be able to adapt to various course conditions and make better decisions on every hole. Understanding the strengths and applicability of each shot shape empowers you to choose the most effective shot to accomplish your desired outcome.
By understanding the basics, perfecting your grip and setup, aligning your body correctly, controlling your swing path and clubface, adjusting weight distribution and ball position, emphasizing body rotation, making effective club selections, adapting to wind and course conditions, practicing visualization techniques, troubleshooting common mistakes, and knowing when to use a draw or fade, you’ll have all the tools you need to master these shot shapes. With patience, practice, and dedication, you’ll be able to confidently shape your shots and take your golf game to new heights.