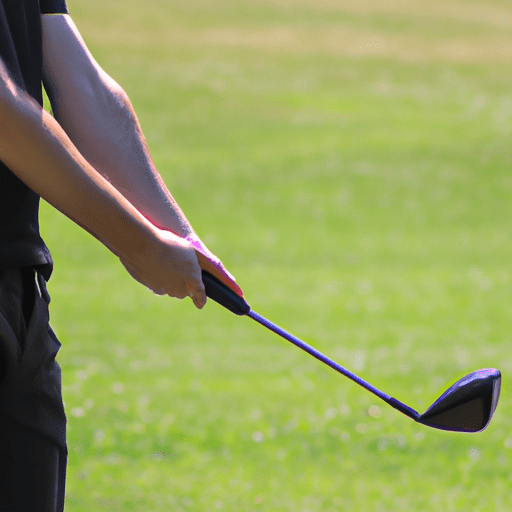
So you’re out on the golf course and you want to take your game to the next level. Well, one way to do that is by mastering the art of generating a draw or a fade shot. These shots are a key part of any golfer’s repertoire and can add finesse and control to your game. Whether you’re looking to curve the ball left (fade) or right (draw), understanding the technique behind these shots can make a world of difference in your performance on the fairway. So, let’s explore the ins and outs of generating a draw or a fade shot and elevate your golfing skills to new heights.
Understanding Draw and Fade Shots
Definition of Draw and Fade Shots
Draw and fade shots are two different shot types in golf that players use to make the ball curve in different directions.
A draw shot refers to a shot that curves from right to left for right-handed golfers (left to right for left-handed golfers). The ball starts off slightly to the right of the target and then curves back towards the target. This type of shot typically has a lower trajectory and produces more roll upon landing.
On the other hand, a fade shot is a shot that curves from left to right for right-handed golfers (right to left for left-handed golfers). The ball starts off slightly to the left of the target and then curves away from the target. A fade shot usually has a higher trajectory and less roll upon landing.
Differences between Draw and Fade Shots
One of the main differences between draw and fade shots is the initial direction the ball takes off. In a draw shot, the ball starts to the right of the target (for right-handed golfers), while in a fade shot, it starts to the left. The curvature of the ball flight also varies, with a draw shot curving towards the target and a fade shot curving away from it.
In terms of technique, the draw shot typically requires a closed clubface at impact, while the fade shot requires an open clubface at impact. Additionally, the path of the clubhead through impact is different for draw and fade shots. A draw shot is achieved by swinging the club from inside to outside the target line, while a fade shot is achieved by swinging the club from outside to inside the target line.
Advantages and Disadvantages of Draw and Fade Shots
Both draw and fade shots have their advantages and disadvantages, and the choice between the two depends on the golfer’s skill level, the situation on the course, and personal preference.
One advantage of a draw shot is that it allows the golfer to maximize distance. The lower trajectory and added roll can result in longer drives or shots from the fairway. Additionally, a draw shot can be helpful when trying to navigate around obstacles or when playing on a course that requires shots to land close to the target and roll towards it.
On the other hand, a fade shot can be beneficial when trying to control the ball flight or achieve a softer landing. The higher trajectory and reduced roll can help the ball stop quicker upon landing, making it a useful shot for playing into greens or when there are hazards near the target.
However, both draw and fade shots also have their disadvantages. Draw shots can be more difficult to control and may be prone to hooks if not executed properly. Fade shots, on the other hand, can be more challenging to generate enough distance and may not be as suitable in windy conditions.
Generating a Draw Shot
Grip and Stance
To generate a draw shot, the proper grip and stance are crucial. Start by gripping the club with your left hand, making sure the handle rests primarily in the fingers rather than the palm. Then, place your right hand on the club, interlocking it with the left hand or using the overlapping grip.
For the stance, position your feet slightly wider than shoulder-width apart, with the left foot flared slightly towards the target. Aim your body slightly to the right of the target to account for the ball’s draw curve.
Alignment and Aim
Proper alignment and aim are essential for hitting a draw shot. Align your body parallel to the target line, with your shoulders, hips, and feet all pointing slightly to the right. Aim the clubface slightly to the right of the target as well.
Backswing
During the backswing, focus on maintaining a compact and connected motion. Avoid taking the club too far inside or outside the target line. Keep your wrists hinged and your left arm straight, rotating your shoulders to create a wide arc.
Downswing
In the downswing, initiate the movement with your lower body. Shift your weight onto your left side and rotate your hips towards the target. As you begin to bring the club down, keep your hands close to your body and ensure that the clubhead stays behind your hands.
Impact
At impact, the key is to have a slightly closed clubface relative to the target. This closed clubface position will help produce the draw spin on the ball. Keep your hands ahead of the clubhead, compressing the ball with a slightly downward strike.
Follow-through
Finish your swing with a full, balanced follow-through. Allow your body to rotate towards the target, and let your arms extend fully. Your club should finish high, with the toe of the club pointing towards the sky.
Correcting Common Mistakes in Draw Shots
Slicing the Ball
One common mistake when trying to hit a draw shot is slicing the ball instead. This occurs when the clubface is open at impact, causing a spin that curves the ball from left to right (for right-handed golfers). To correct this mistake, you need to focus on closing the clubface at impact. Practice hitting shots with a deliberately closed clubface, making adjustments until you achieve the desired draw flight.
Closing the Clubface Too Much
On the other hand, closing the clubface too much can result in a hook, where the ball starts straight before quickly curving to the left (for right-handed golfers). To avoid this, ensure that the clubface is only slightly closed at impact. Experiment with different grip positions and wrist movements to find the right balance.
Incorrect Swing Path
An incorrect swing path can also affect the outcome of a draw shot. If your swing path is too much from the inside (swinging too far to the right for right-handed golfers), it can lead to a hook. To fix this, focus on swinging the club on a more neutral path, directly towards the target, or slightly from inside to outside.
Overcompensating for a Slice
Sometimes, golfers who struggle with a slice tend to overcompensate when trying to hit a draw shot. This can lead to exaggerating the draw spin and ending up with a hook. To avoid this, start by addressing the underlying issues causing the slice. Work on improving your swing fundamentals and gradually introduce the draw shot technique once you have better control over your ball flight.
Practice Drills for Draw Shots
Alignment Stick Drill
To practice hitting draw shots, use an alignment stick or a club laid on the ground parallel to the target line. Position the stick slightly to the right of your target line, aiming towards the left. Practice hitting shots without striking the stick, focusing on swinging from inside to outside and developing the correct clubface position at impact.
Impact Bag Drill
An impact bag is a useful training aid for improving contact and strike. Set up the impact bag in the proper position and swing into it, making sure to strike the bag with a slightly closed clubface. The bag will provide feedback on your clubhead position at impact, helping you develop a more consistent draw shot.
Swing Path Drill
To work on your swing path, place two alignment sticks or clubs on the ground, forming a V-shape in front of you. Position the clubs to guide your swing along the correct path, with the clubhead entering the V from inside and exiting on the outside. This drill will help you develop the proper swing path for hitting draw shots.
Training Aid: Draw Bias Driver
Consider using a driver with a draw bias to help promote a draw shot. These drivers have weight distribution and clubhead features designed to enhance the draw spin. Experiment with different draw bias drivers and see which one works best for your swing.
Generating a Fade Shot
Grip and Stance
To generate a fade shot, the grip and stance are similar to a draw shot. Use a neutral grip with the club resting primarily in the fingers of both hands. Position your feet slightly wider than shoulder-width apart, aiming your body parallel to the target line.
Alignment and Aim
For a fade shot, align your feet, hips, and shoulders slightly to the left of the target (for right-handed golfers). Aim the clubface slightly to the left of the target as well, accommodating the fade curve.
Backswing
Just like with a draw shot, maintain a compact and connected backswing motion. Focus on keeping the club on the correct swing plane, avoiding swinging too far inside or outside the target line.
Downswing
During the downswing, make sure to transition smoothly from the backswing. Allow your lower body to initiate the movement, shifting your weight onto your left side and rotating your hips towards the target. Keep your hands close to your body as you bring the club down.
Impact
At impact, the key is to have a slightly open clubface relative to the target. This open clubface position will help produce the fade spin on the ball. Maintain a downward strike on the ball, compressing it against the turf.
Follow-through
Finish your swing with a smooth, balanced follow-through. Let your body rotate towards the target and extend your arms fully. The club should finish at or slightly below shoulder height, with the toe of the club pointing slightly to the left.
Common Mistakes in Fade Shots
Hooking the Ball
Similar to draw shots, one common mistake when trying to hit a fade shot is hooking the ball instead. This occurs when the clubface is closed at impact, resulting in a spin that curves the ball from right to left (for right-handed golfers). To correct this, focus on maintaining a slightly open clubface position and avoid excessive clubface manipulation during the swing.
Leaving the Face Wide Open
Leaving the clubface wide open at impact can prevent the desired fade spin. If the clubface remains open, the shot may end up going straight or even veering to the right (for right-handed golfers). To avoid this, check your clubface position at impact and ensure it is only slightly open.
Incorrect Swing Path
An incorrect swing path can also affect the outcome of a fade shot. If your swing path is too much from the outside (swinging too far to the left for right-handed golfers), it can lead to a slice. Focus on swinging the club on a more neutral path, directing it towards the target or slightly from outside to in.
Overcompensating for a Hook
Some golfers tend to overcompensate when trying to hit a fade shot by exaggerating the fade spin. This can result in a weak fade that does not travel far. Instead, focus on making slight adjustments to your swing and clubface position to achieve a controlled fade that maintains distance.
Practice Drills for Fade Shots
Alignment Stick Drill
Use an alignment stick or a club on the ground to practice hitting fade shots. Position the stick slightly to the left of your target line, aiming towards the right. Focus on swinging from outside to inside and develop the correct clubface position at impact without striking the stick.
Impact Bag Drill
Similar to the draw shot drill, use an impact bag to practice striking the ball with a slightly open clubface. Position the bag in the correct position and swing into it, focusing on the desired fade spin. The impact bag will provide feedback on your clubhead position at impact.
Swing Path Drill
Use two alignment sticks or clubs to create a V-shape on the ground, guiding your swing path for a fade shot. Position the V so that the clubhead enters from outside and exits on the inside. This drill will help you develop the proper swing path and clubface position for hitting fade shots.
Training Aid: Fade Bias Driver
Consider using a driver with a fade bias to help promote a fade shot. These drivers have features that encourage the fade spin, making it easier to achieve the desired ball flight. Experiment with different fade bias drivers and find one that complements your swing style.
Choosing the Right Shot for the Situation
Factors to Consider
Choosing between a draw or a fade shot depends on various factors. First, consider the hole layout and the specific shot required. Assess the distance to the target, the shape of the fairway or green, and any hazards or obstacles in the way.
Second, consider your comfort level with each shot. If you have more confidence or experience with one type of shot over the other, that may influence your decision.
Lastly, take into account the course conditions, such as wind direction and speed. A draw shot may be more suitable in a crosswind, as it can help counteract the wind and keep the ball on target.
Assessing Course Conditions
Before selecting a shot type, evaluate the course conditions thoroughly. If the fairways or greens are firm and provide good roll, a draw shot may be advantageous as it can maximize distance. On the other hand, on softer or more receptive surfaces, a fade shot may work better, as it tends to land softer and stop quicker.
Additionally, consider the condition of the fairway or green slopes. If there are severe slopes or undulations that can influence the ball’s roll, choose the shot type that can help navigate those features more effectively.
Shot Selection Strategy
Developing a shot selection strategy can greatly improve your decision-making on the course. While it is essential to have shot versatility and the ability to execute both draw and fade shots, consider strategizing in advance for each hole.
Review the yardage, hazards, and layout of the hole from the tee to green. Determine which shot type, draw or fade, provides the best advantage for positioning and scoring on each hole. Adjust your strategy depending on the hole’s difficulty, your strengths, and the conditions on the day.
Mastering Draw and Fade Shots in the Short Game
Chipping with a Draw or Fade
The draw and fade techniques can also be applied to the short game, specifically chipping around the green. Similar to full shots, a draw chip will have a slight right-to-left curvature (for right-handed golfers), while a fade chip will have a slight left-to-right curvature.
When chipping with a draw technique, set up with your feet and body aligned slightly to the right of the target. Close the clubface slightly, aiming left of your target. Take a slightly steeper backswing and follow-through along the target line, releasing the clubhead with a slightly closed face.
For a fade chip, set up with your feet and body aligned slightly to the left of the target. Open the clubface slightly, aiming right of your target. Take a shallower backswing and follow-through along the target line, allowing the clubface to stay slightly open throughout the swing.
Pitching with a Draw or Fade
Similar to chipping, the draw and fade techniques can be applied to pitching shots around the green. The draw pitch will create a controlled right-to-left spin, while the fade pitch will produce a left-to-right spin.
When pitching with a draw technique, set up with your feet and body aligned slightly to the right of the target. Close the clubface slightly, aiming left of your target. Take a comfortable backswing, keeping the club nose slightly in front of the hands. Maintain a controlled follow-through, releasing the clubhead with a slightly closed face.
For a fade pitch, set up with your feet and body aligned slightly to the left of the target. Open the clubface slightly, aiming right of your target. Take a smooth backswing, keeping the club nose slightly behind the hands. Deliver a controlled follow-through, allowing the clubface to stay slightly open throughout the swing.
Putting with a Draw or Fade
While draw and fade shots are predominantly associated with full swings and the short game, the principles can also be applied to putting. Adjusting your putter face angle and choosing a draw or fade line can help you navigate tricky slopes or challenging green speeds.
To putt with a draw, set up with your body aligned slightly to the right of the target. Close the putter face slightly, aiming left of your target. Maintain a smooth pendulum-like putting stroke, following the arc along the desired draw line.
For a fade putt, set up with your body aligned slightly to the left of the target. Open the putter face slightly, aiming right of your target. Apply a smooth and controlled putting stroke, following the arc along the desired fade line.
Tips and Tricks from the Pros
Analyzing Professional Golfers’ Techniques
When looking to improve your draw and fade shots, it can be helpful to analyze the techniques of professional golfers. Observing how they generate these shots and the nuances in their swings can provide valuable insights.
Study the swings of golfers known for their draw shots, such as Jack Nicklaus, Tiger Woods, or Phil Mickelson. Pay attention to their grip, setup, and swing paths, and try to incorporate some of their techniques into your own game. Similarly, analyze the swings of golfers known for their fade shots, such as Tom Watson or Ben Hogan, and learn from their approaches.
Implementing Their Strategies
Once you have observed and studied the techniques of professional golfers, it is essential to implement their strategies into your practice. Take the key elements you have learned and apply them to your own swing.
Experiment with grip changes, swing plane adjustments, and clubface positions to find what works best for you. Practice regularly, and pay attention to the ball flight and consistency of your draw and fade shots. Emulate the rhythm and tempo of professional golfers to achieve greater control and accuracy.
Adapting to Your Own Style
While it is helpful to learn from professional golfers, it is essential to remember that every golfer has their own unique style and strengths. Adapt their techniques to suit your physical abilities, flexibility, and playing style.
Experiment with different setups, grip positions, and swing paths to find what feels most comfortable for you. Develop your own signature draw and fade shots that can be reliably executed in different situations. Remember that consistency and control are key, so practice regularly and focus on perfecting your techniques to achieve the desired shot shape on demand.
By understanding draw and fade shots, honing your technique, and using effective practice drills, you can add versatility to your game and gain an edge on the golf course. Whether it’s hitting longer drives, navigating challenging fairways, or controlling the ball around the greens, mastering draw and fade shots will enhance your overall golfing experience and improve your scores.